APPY STUDIO TIPS AND FAQs
Valuable Tips for Beginners:
- Explore the different Text templates, different Backgrounds and Graphics available to see all your options.
- Create a test invite and go through all the steps before you send out anything to your guests.There's no limit to the number of drafts you can save.
- Some graphics can be colorized. Select the graphic and click the paint brush tool to change the color
- You can drag your mouse over multiple objects to select a few at the same time
- You can group objects (so they can be moved together) when multiple are selected by clicking the GROUP icon on the top right
- Use arrow keys on your keyboard to nudge items up and down with precision
- Always remember to SAVE your changes
Some icons to look out for when designing:
Magnet: Snap to object edges
Ungroup: A lot of our preset graphics and text blocks are grouped, to move individual items around, you would need to unlock them.
Group: need to move a whole lot of items together? Group them! click to select each item, press shift on your keyboard while selecting multiple and then click GROUP (top right corner),
Resize: When items are grouped, you can select an edge of the group (blue outline) and then drag in to change the size).
How can I upload my own invitation?
1: Go to LAYOUTS
2: Select a BLANK THEME TEMPLATE from the sub-section STOCK
3: Click BACKGROUND from the left menu
4: Upload your custom layout as an image file (JPG, PNG)
The optimum size of your image should be in an aspect ratio of 5X7 (portrait)
5: Click the UPLOADED tab in the sub-menu and you will see any uploaded images. Click on the image you want to use, this will populate the canvas area
What if the invitation I uploaded doesn't fit the template?
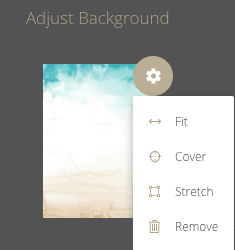
To Adjust the 'fit' of the background or remove it:
1: In the sub-menu BACKGROUND click the gear icon next to the background image in use
2: Select an option from Fit, Cover, Stretch or Remove
Once you are happy with the position, proceed to the COMPOSE tab to add a personalized message, call-to-action buttons and a link the invitation to your website.
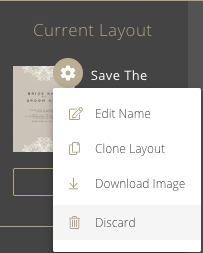
How do I delete a Layout?
1: Go to the LAYOUTS tab, then the sub-section SAVED
2: Select the Layout you want to delete
3: This layout is now shown on your canvas and in the left bar under CURRENT LAYOUT
4: Click the gear icon and select DISCARD
How do I use the templated layouts?
Photo Save The Date or Announcements
(Any template with an image background)
1: Go to Layouts
2: Click on Stock in the sub-menu and select Photo Save The Date (mouseover templates to see the names).
3: Click Photo Save The Date and it will load onto your canvas. (Note, any existing canvas art will be replaced).
4: If you have a welcome image loaded on your Appy site it will replace the placeholder image (or show blank).
5: You can click on the image to change it if you want. When you click on the image a toolbar will appear above your canvas. Click the camera icon and it will show you all available images from your Appy account. Select the one to replace.
OR
To delete the image and manually replace:
Ungroup the selection (top right toolbar)
Then, delete the image and drag another image from your IMAGES tab or upload a new one.
Don't forget to send to back.
To Send To Back, click the image, it will be selected, then use the Arrange icon on the top right toolbar to select Send To Bottom
6: All text is a placeholder and serves as a guide, please review and edit to your content.
7: Don't forget to click SAVE on the top left of the page
TIPS:
To change the image with a new image not found on your account:
Upload a new image in the IMAGE tab (left menu) and then repeat step 5.
Image Size and Aspect Ratio:
This card features a portrait size image (5X7). We suggest using images best suited for this aspect ratio.
Editing text:
Click on any text object to see the text editing toolbar and edit the text within the selection.
invitations
1: Go to Layouts
2: Click on Stock in the sub-menu and select Wedding Invitation (mouse-over templates to see the names).
3: Click Wedding Invitation and it will load onto your canvas. (Note, any existing canvas art will be replaced).
4: Click on any text object to see the text editing toolbar and edit the text within the selection. All text is a placeholder and serves as a guide, please review and edit to your content.
5: Don't forget to click SAVE on the top left of the page
How do I color a graphic?
If a graphic can be colored, you will see a paint roller icon on the top bar, just click that and select the color you want to colorize the graphic (or group).
Note: Some graphics cannot be colored, these are few and far in between). This is to maintain the aesthetic of the graphic palette.
How do I edit it or resize a stock text graphic?
Click the edge of the container box (blue line with squares) — select any end corner and drag into the size you want to re-size and maintain your styling.
How do I change the color of a stock text block?
Just select the box (a blue outline will show), then click the palette icon on the top band to change the color of all elements. To change the color of individual elements, double click on the element and then click the palette icon.
My sent layout is locked, what do I do?
Sent layouts are locked as you cannot edited emails already delivered. You can CLONE the layout or just go to the LAYOUTS tab and then STOCK and select a new template.
How to view Email Stats
Each mailing you send collects your recipients' activity data. You can check who opened and clicked on your mailing and also which email didn't reach it's recipient.
You can view your stats by going to your CONTACTS Tab. There by each guest entry you will see a bubble representing each sent mailing with the relevant color codes.
You can also filter your Contacts List by availability of the stats.
Click the bubble to view the following:
- Dusky Blue for SENT- meaning the mailing was sent.
- Light Blue for OPEN - meaning this guest opened the email but did not click any link.
- Leaf Green for CLICK - meaning this guest clicked on any link/button in the email.
- Oops Red for BOUNCE - meaning the email was undeliverable because the address was incorrect or it was blocked.

What is the difference between Appy Studio and Correspondence?
The Correspondence is ideal for text emails that are straightforward and simple. However if you're looking for a stylized, sophisticated template or to use your own image, then Appy Studio is the way to go.
| Appy Studio | Correspondence |
| Add a personal message | Add a personal message |
| Edit subject line | Edit subject line |
| Replies come to you | Replies come to you |
| Link to your website and app | Link to your website and app |
| Send unlimited emails | Send unlimited emails |
| Filter Recipients List | Filter Recipients List |
| Use 60+ different Fonts | Use 7 different fonts |
| Edit colors | |
| Add graphics | |
| Upload your own design | |
| Add photos | |
| Create versions of your design | |
| Change the background | |
| Position text & graphic elements anywhere on canvas | |
| Rotate, resize, color any text, graphic and photo | |
| Change Opacity | |
| Personalize guest name | |
| Include buttons to RSVP | |
| Include Address Collection button |